Configuring Remote Desktop Services on Windows Server 2012 R2
TL;DR ✨
This article follows on from the previous guide to configuring a domain controller. Here, remote access will be configured for domain users. This was formerly described in the literature as Terminal Services and is now known as Remote Desktop Services. Microsoft essentially provides CALs to permit access for multiple users.
Now select the machine where licensing will take place. For these purposes, the straightforward approach is to make the domain controller on which RDS is being configured serve as the terminal server as well. Double-click the machine in the server pool so that it appears in the Selected box.
From the archive
This article was first published on 2017-08-27. It is also a snapshot of its time, so some details and recommendations may no longer reflect the current situation.
This article follows on from the previous guide to configuring a domain controller. Here, remote access will be configured for domain users. This was formerly described in the literature as Terminal Services and is now known as Remote Desktop Services. Microsoft essentially provides CALs to permit access for multiple users. For this to be handled legally, there must be a machine—a terminal server—where the licensing is configured in case the company is audited. The following steps show the configuration:
Overview of the series:
- Configuring a Domain Controller
- Configuring RDS (Remote Desktop Services)
- Configuring the RemoteApp service and demonstrating how to launch services on Windows clients
- Installing the WinConn client (a modified version of FreeRDP) to launch applications on Linux
🔍 2. Configuring RDS (Remote Desktop Services), followed by the RemoteApp service
Open Server Manager, click add roles and features, and select remote desktop services installation.
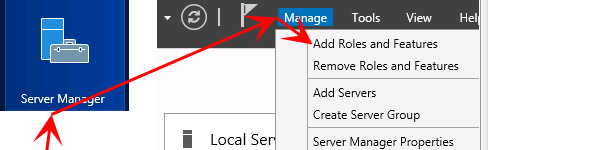
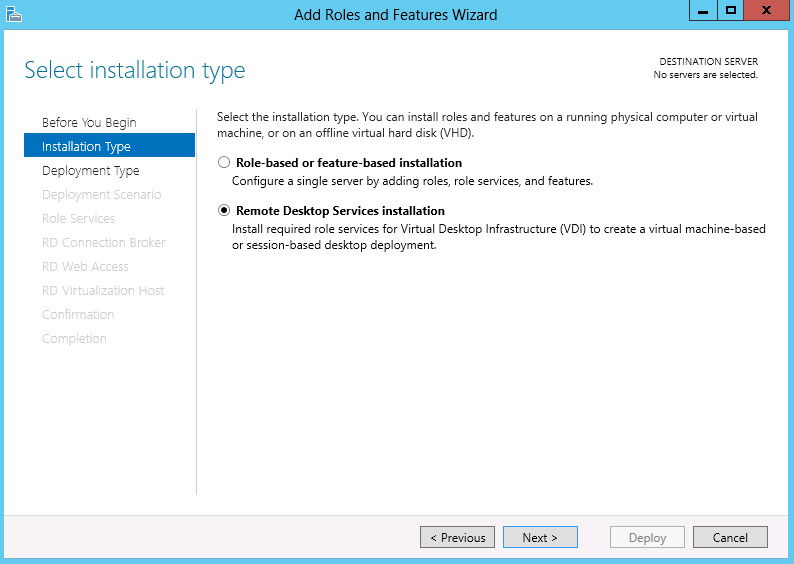 Remote Desktop Services installation
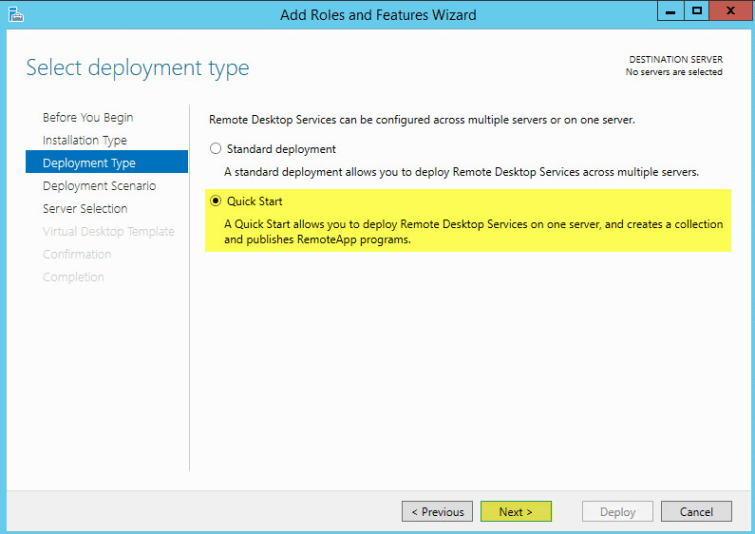
Select Quick start for these purposes:
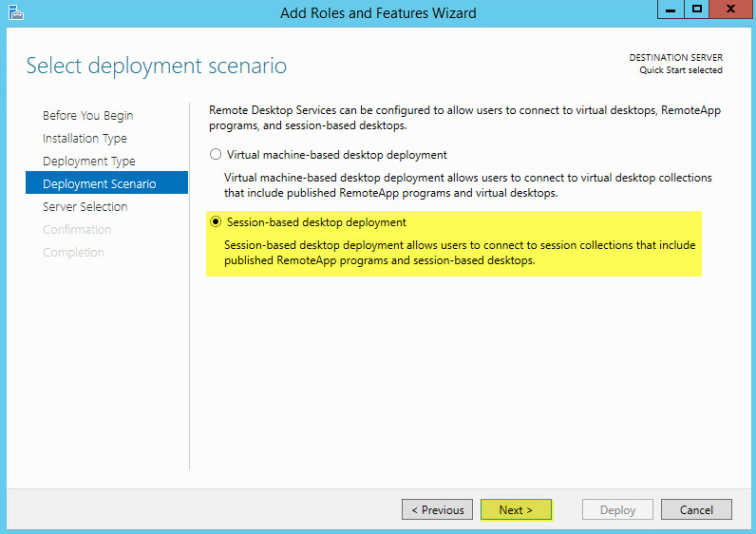
Select session based desktop deployment and click Next.
Now select the machine where licensing will take place. For these purposes, the straightforward approach is to make the domain controller on which RDS is being configured serve as the terminal server as well. Double-click the machine in the server pool so that it appears in the Selected box.
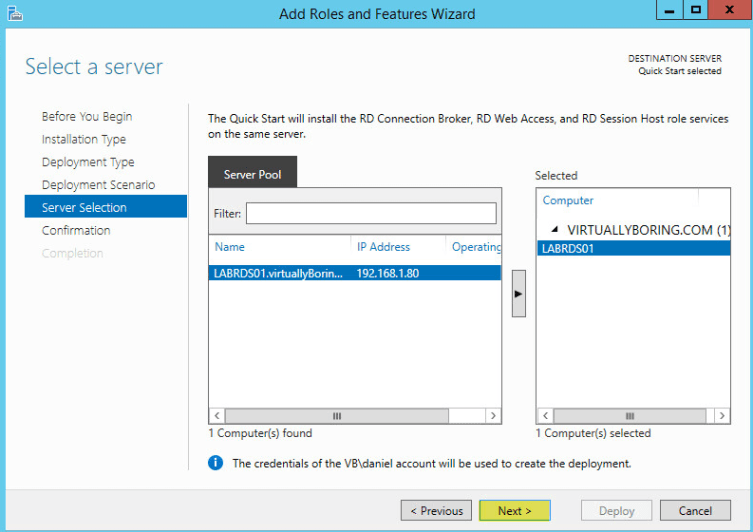
Confirm everything and wait for a while until all three services have been installed. The setup is then complete:
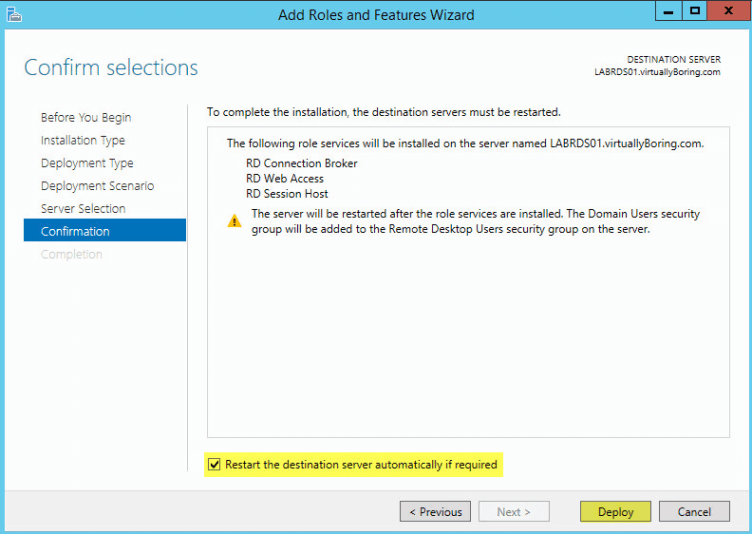
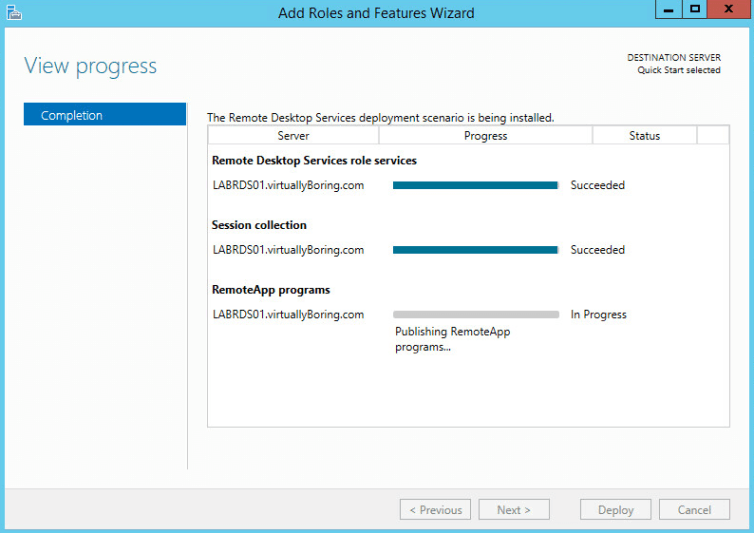
After the machine restarts, the setup is complete and RDS is active for these purposes for 120 days, until it is licensed. Licensing is more complicated and is not covered in this article. Details about licensing are available in this article: http://www.techieshelp.com/windows-server-2012-install-and-configure-remote-desktop-services/
Sources: Some images were taken from: https://www.virtuallyboring.com/setup-remote-desktop-services-in-windows-server-2012-r2/
To continue to Part 3—Configuring RemoteApps on Windows Server 2012 R2—click here.