ABRA FlexiBee Access Rights Modification
TL;DR ✨
Access-right management is a fundamental security feature of almost every information system, and FlexiBee is no exception. A sound configuration gives users only the capabilities they need. Giving everyone access to everything is an early source of disorder and later problems.
The author considers a structure with a single administrator acceptable. FlexiBee includes predefined roles, but he recommends deleting all except the administrator role and creating roles tailored to the organization. The process is also described in the FlexiBee manual.
Access-right management is a fundamental security feature of almost every information system, and FlexiBee is no exception. A sound configuration gives users only the capabilities they need. Giving everyone access to everything is an early source of disorder and later problems.
The author considers a structure with a single administrator acceptable. FlexiBee includes predefined roles, but he recommends deleting all except the administrator role and creating roles tailored to the organization. The process is also described in the FlexiBee manual.
Open Tools - User roles and create a new group.
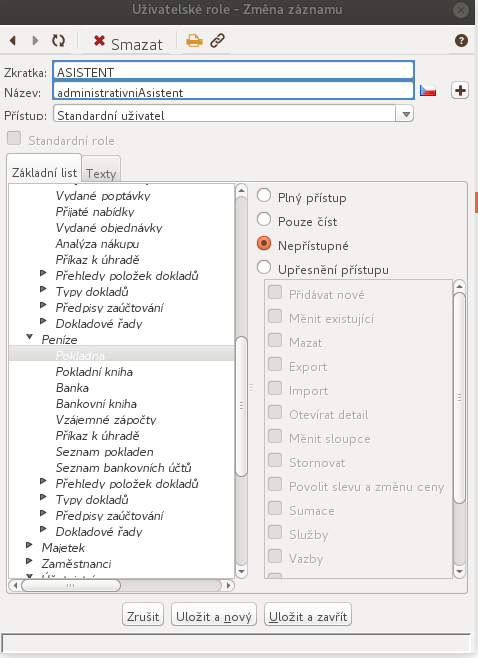
The wizard asks which existing configuration to copy. Choose one, assign the group a machine-readable code and description, and set the access type to standard user. Next, disable everything. Open each container, such as FlexiBee, Business Partners, Goods, and Sales, and mark the whole category as inaccessible. Applying this to all subcategories can take a long time while the server updates the permissions.
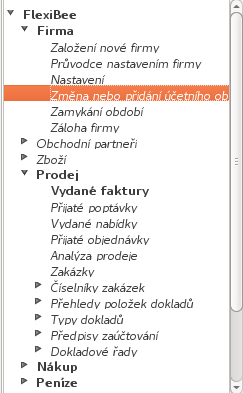
Then open a required container, such as Purchasing, grant full access, and prevent that permission from applying to every subfolder. Items visible to the user should appear in bold.
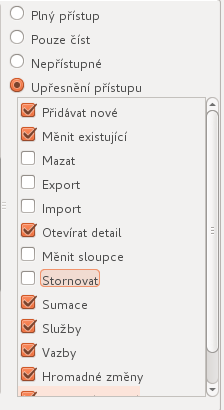
For an individual subcategory such as Sales - Issued invoices, configure only the rights actually needed. The author advises against full access by default. Detailed permissions can prevent group members from cancelling invoices, changing columns, or exporting company data.
After completing the role, open Tools - People and users, select a user, click Change, and assign the new role.
The only reliable test is to sign in as that user and inspect every relevant area. This is slow, but necessary. The screenshot below shows the resulting interface; it still needs a manual visual check. Experience makes the process faster, but for a one-off configuration, that check remains the safest option.