Configuring a Domain Controller on Windows Server 2012 R2
TL;DR ✨
This article shows how programs that normally cannot be handled through WINE or various emulators can be made available in Linux.
Imagine a user working on a Linux client who urgently needs Photoshop. One solution is to set up dual boot on the PC and access Photoshop by switching operating systems each time. Windows Server offers another solution. This article demonstrates it.
From the archive
This article was first published on 2017-08-27. It is also a snapshot of its time, so some details and recommendations may no longer reflect the current situation.
This article shows how programs that normally cannot be handled through WINE or various emulators can be made available in Linux.
Imagine a user working on a Linux client who urgently needs Photoshop. One solution is to set up dual boot on the PC and access Photoshop by switching operating systems each time. Windows Server offers another solution. This article demonstrates it.
The procedure consists of four steps:
🔍 1. Configuring a Domain Controller
- Configuring RDS (Remote Desktop Services)
- Configuring the RemoteApp service and demonstrating how to launch services on Windows clients
- Installing the WinConn client (a modified version of FreeRDP) to launch applications on Linux
🔍 1. Configuring the domain controller
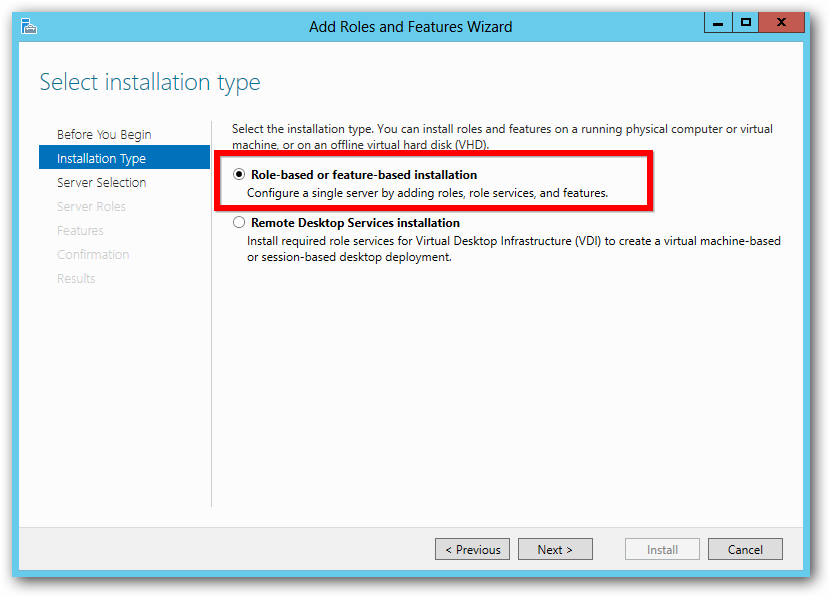
A) Open Server Manager, click manage - add roles and features, and select Role-based or feature based installation.
Select AD DS and click Next:
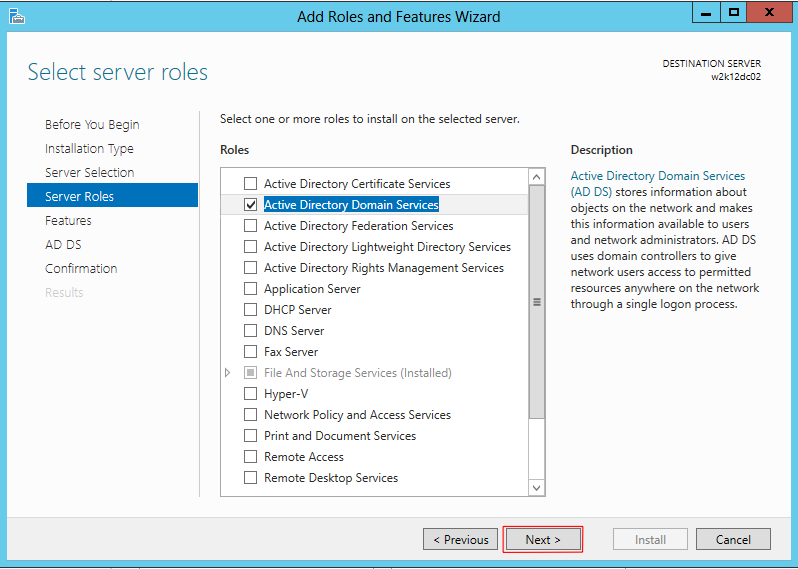 Active Directory Domain Services
There is no need to select anything under Features here; simply click Next. This is primarily where the GPO (Group Policy Management) feature is added.
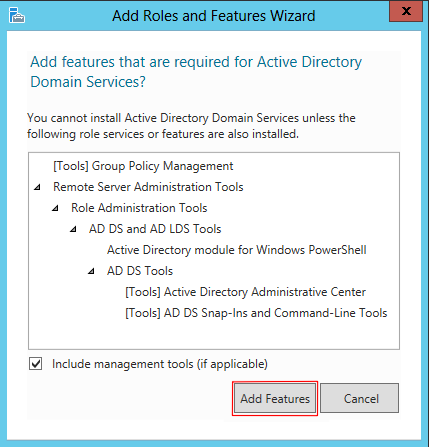 Features - GPO
Confirm everything selected above:
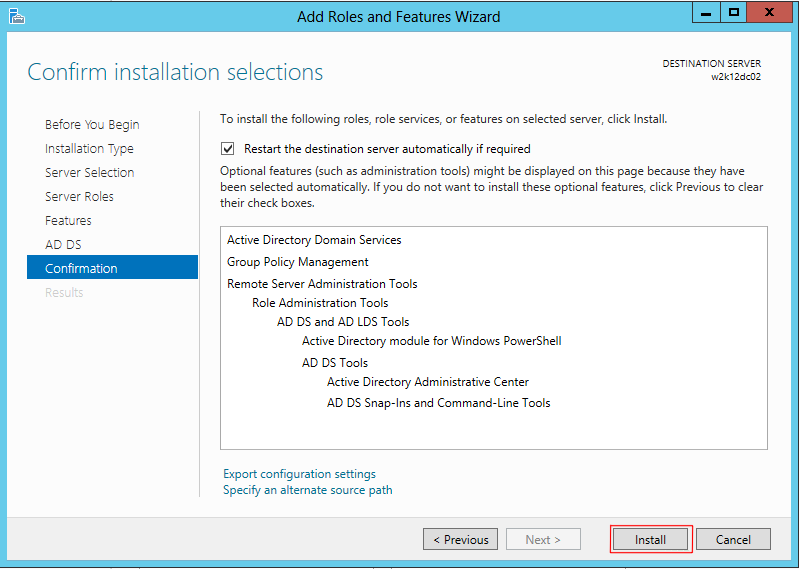 Confirming the Windows Server AD DS installation
Then install everything that was confirmed:
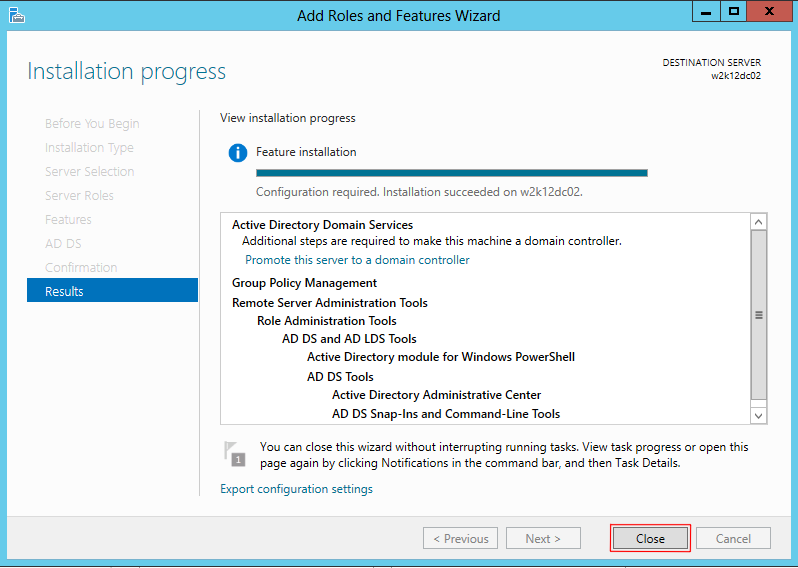 Installing AD DS
After installation, click the flag at the top and select the option to promote the server to a domain controller:
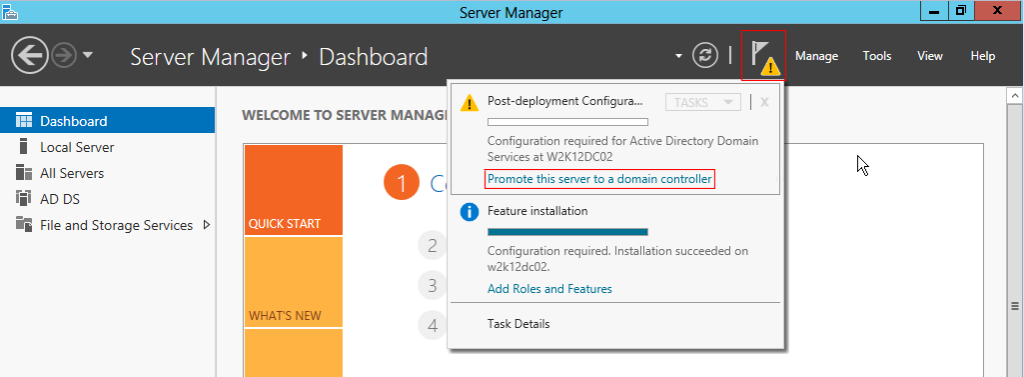 Promoting the server to a domain controller
Create a new forest and enter the domain name (root domain name). Be careful to choose a sensible domain name. For example:
- pv1.connectica
- ol1.connectica
Or, if there is only one machine, for example:
- cnnc.local
- rebeladmin.net
The longer the domain name, the more annoying it is for every employee to type when signing in. Choose the name thoughtfully.
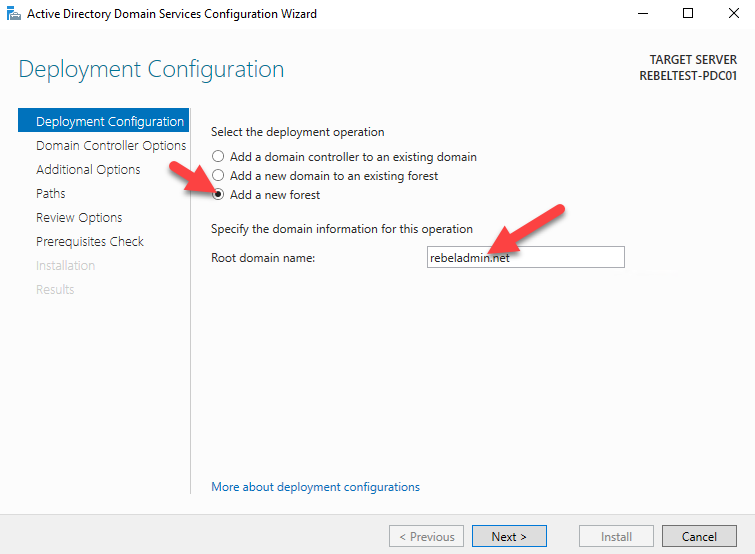
Click Next and simply confirm the settings. With Windows Server 2012, leave the settings as shown here. With Windows Server 2012 R2, both the forest functional level and the domain functional level should be Windows Server 2012 R2.
Enter a password for restore mode below. The reason will become clear later. Be sure to save the password.
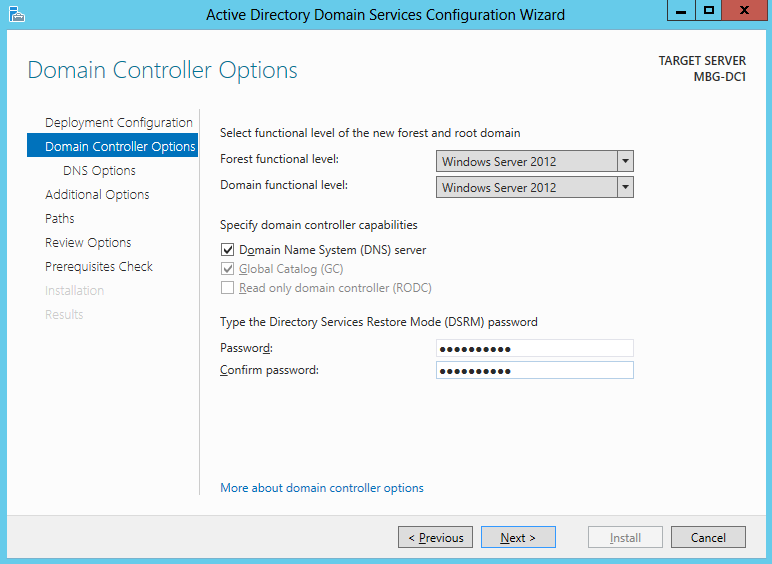 Domain controller settings
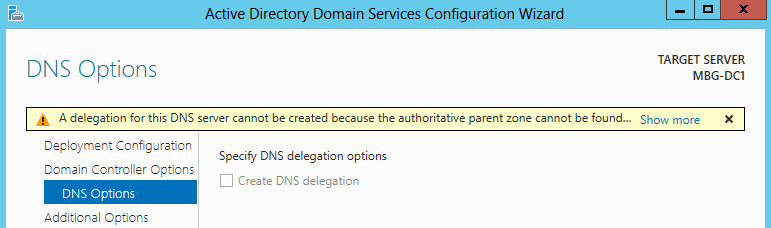
The DNS options can be skipped for these purposes. Click Next:
The NetBIOS name can be anything; it does not matter here:
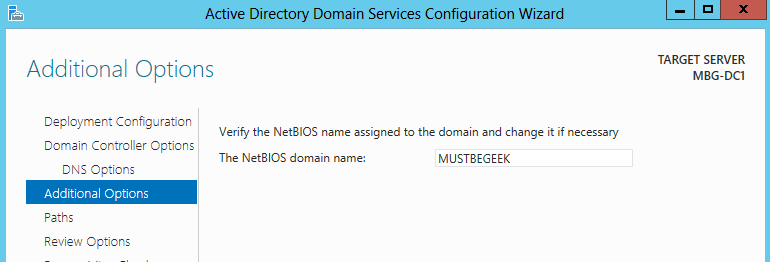 NetBIOS in Windows Server 2012 R2
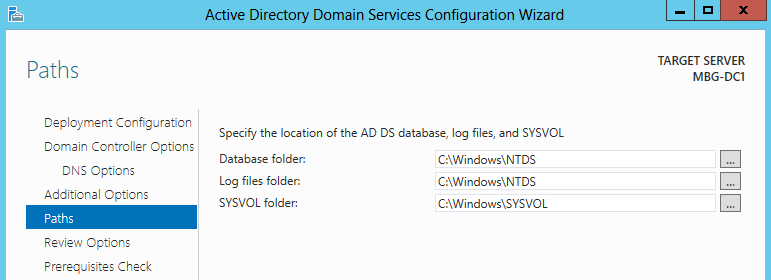
The paths used to store the schema, logs, and SYSVOL database can be left as they are:
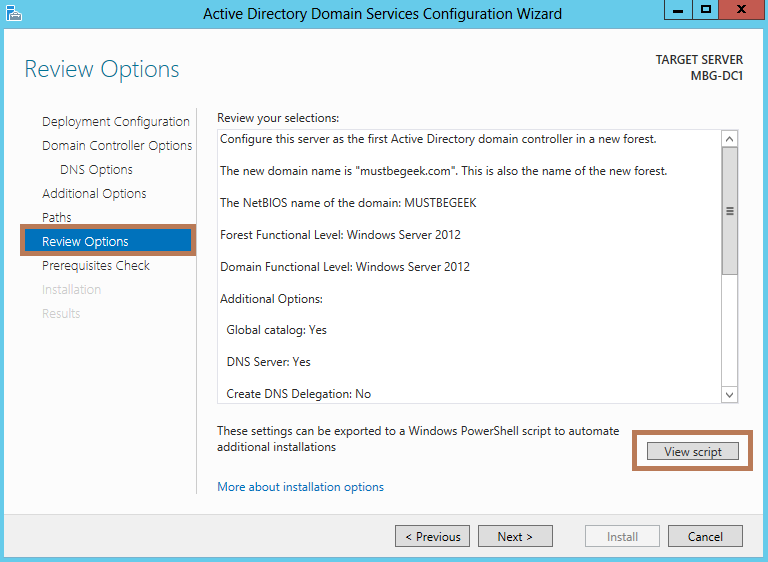
Check the complete configuration on the review screen. If everything is correct, click Next and then confirm the installation:
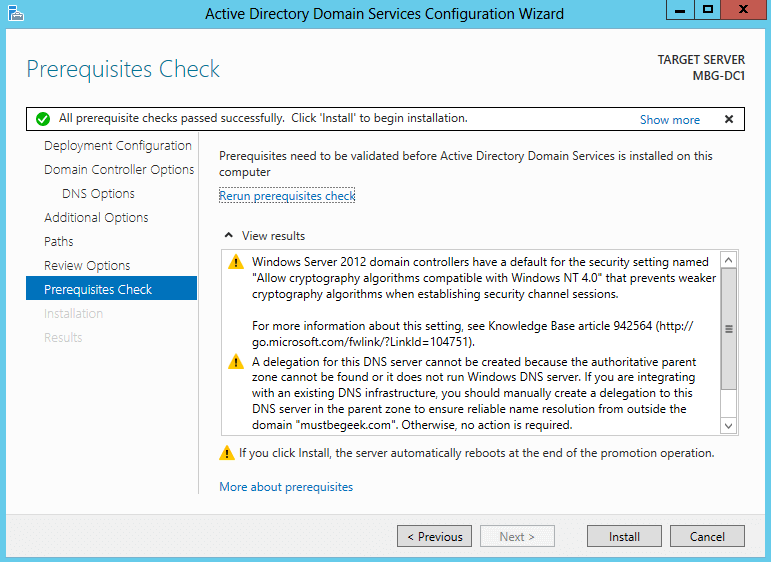
Done! The next article continues with the second configuration — Remote Desktop Services.